Contents Jump to section
UPDATED March 2026 -- This post has been reviewed and updated to reflect current Microsoft product names, portal locations, and technology status. See inline notes for specific changes.
If you love Azure Automation and Security, you probably know that since around April 2021, Managed Identities in Azure Automation is the best way to access resources securely.
This article will show why and how you should use Managed Identities to simplify your resource access management. And end it with showing how I have made my Graph API-related Runbooks much leaner.
The expected audience for this article is IT Pros with general experience managing access to Microsoft Entra ID roles and Azure Resources.
UPDATE: Here is an example of how to connect to an Exchange Online PSSession: ExchangeOnlineScripts/ConnectEXOwithMSIRunbookExample.ps1 at main (github.com)
NOTE (Updated 2026): The Azure Automation RunAs account was retired on September 30, 2023. If you are still using RunAs accounts, migration to Managed Identities is required. This post covers Managed Identities, which is the correct modern approach.
What are managed identities?
Managed Identities are accounts in your Microsoft Entra ID that are only available for use by the resources that you have assigned them to. This could be an Azure automation account or some other service like Azure Functions or Azure VM. But it is not a given that they are supported in every type of Azure Resource.
Managed Identities come in two flavors
- System assigned - tied to the lifecycle of a single resource (i.e., an Azure Automation account) much like a classic Active Directory managed service account (MSA)
- User assigned - can be thought of as a classic group managed service account (gMSA), that is available to multiple resources
NB: In this article we only deal with System assigned as I feel that is easiest to manage when thinking about the lifecycle management of our solutions in Azure.
How are they more secure?
Managed Identities are more secure because their "credentials" are only available to the resource they are assigned to, and they are never exposed in code. Unlike other account types that rely on an administrator to handle the credentials at some point, Managed Identities credentials are at no point handled by the systems administrator or anyone else. It is all handled by Azure, like a boss!
They are never exposed in code
Not having to deal with any form of credential (i.e., certificates or secrets) greatly enhances the security posture of the solutions you develop. And having to monitor for expired client secrets or certificates for app registrations is a thing of the past.
How do I get started with using Managed Identities in Azure Automation?
To get started with Managed Identities you first need an Azure Automation account. And I suggest you start with a fresh Azure Automation account in a new Resource Group that will hold your automation solution.
NB: When you create your new Azure Automation Account, a default option is to create a RunAs account. I would like you to consider not using that option during creation. It is not wise to enable RunAs accounts unless you will be using them.
Actually using the managed identity for something cool!
First off, it is extremely easy to use a managed identity within your Runbook, once it is supported by the PowerShell modules that you use. Currently Az.Accounts is the only one that I have been using.
Using managed identities with the connect-azaccount cmdlet is very easy. Simply add this line to your runbook:
Connect-AzAccount -IdentityYes. It is that easy! You just connected to Azure using a managed identity.
Accessing Microsoft Graph API with a managed identity
There are many ways to work with Microsoft Graph API. I prefer the PowerShell SDK when working with the Microsoft Graph API in a Runbook since it will make it much leaner and less prone to errors than invoking web requests. Still, support for managed identity is missing at the time of writing this.
The PowerShell module does, however, support the use of an access token. So we can simply call on the system assigned managed identity, to generate an access token that is valid for the Microsoft Graph API endpoint. Take a look at this code:
#Obtain AccessToken for Microsoft Graph via the managed identity
$resourceURL = "https://graph.microsoft.com/"
$response = [System.Text.Encoding]::Default.GetString((Invoke-WebRequest -UseBasicParsing -Uri "$($env:IDENTITY_ENDPOINT)?resource=$resourceURL" -Method 'GET' -Headers @{'X-IDENTITY-HEADER' = "$env:IDENTITY_HEADER"; 'Metadata' = 'True'}).RawContentStream.ToArray()) | ConvertFrom-Json
$accessToken = $response.access_token

#Define the desired graph endpoint
$graphApiVersion = 'beta'
Select-MgProfile -Name $graphApiVersion

#Connect to the Microsoft Graph using the acquired AccessToken
Connect-Graph -AccessToken $accessToken
Micro deep dive
First, we define the API URL that we know the Microsoft Graph API PowerShell SDK uses in the background.
Second, we build the Uri for our invoke-webrequest. Nothing special here, except the fact that we are using two very magic environment variables:
$env:IDENTITY_ENDPOINT$env:IDENTITY_HEADER
These two variables are only accessible by the automation account and only valid when processing the runbook. It's sort of like a little private webserver within your runbook that you can send a request to. In this case, we are sending a web request that is asking the managed identity service to go to the requested resource URL and get us an access token.
Lastly, we use the Microsoft.Graph PowerShell modules cmdlets to define the Profile we want to connect to, and then initiate the connection with our newly acquired access token.
The end result is a successful connection to the Microsoft Graph!
Assigning permissions to the Managed Identity
Assigning permissions to a managed identity is much like with any other service principal (but..).
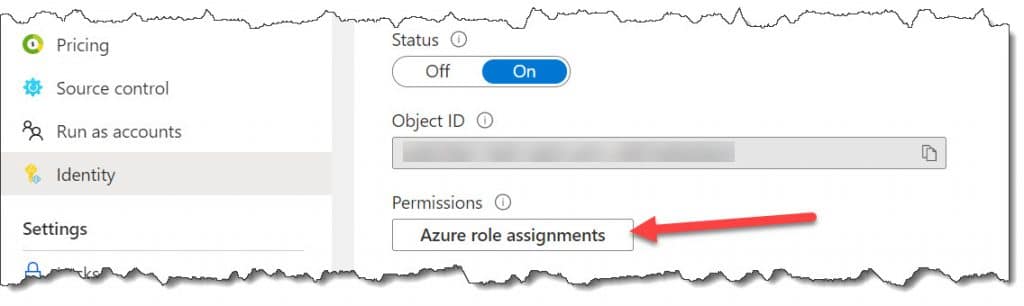
You can add the managed identity to a role in Entra ID and Azure that gives it the required access to the resources you need to access from Azure Automation.
You are however going to have to use PowerShell in order to assign app permissions to things like Exchange Online or Microsoft Graph. And I have created a script to be executed in the comfort of your own Azure Cloud Shell: PSBucket/Add-MGraphMSIPermissions.ps1 at master (github.com)
Needless to say, you should assign the least required privilege.
Conclusion
Using managed identities to access Azure resources is easy and reliable. You should prioritize assessing if they can be used in your solutions from now and going forward. Since client secrets for app registrations are now limited to a maximum of 24 months expiration count, the risk of a service outage due to bad monitoring grows even bigger.
I hope this article helped you to understand that there is more to managed identities than meets the eye.