Contents Jump to section

UPDATED March 2026 -- This post has been reviewed and updated to reflect current Microsoft product names, portal locations, and technology status. See inline notes for specific changes.
Cloud Kerberos Trust for Windows Hello for Business is the apex of single sign-on solutions for your Windows devices. In this Trilogy you can expect to learn the what, the how and the wow!
Co-authored by Ben Whitmore and Michael Mardahl
Looking for other parts? Part 1 -- Part 3
The story so far
We continue our mini series on Windows Hello for Business Cloud Kerberos Trust. In Part 1 we introduced the concept of Cloud Kerberos Trust and spoke to some of the challenges it can help organisations overcome. One of the things that we love is the simplicity of configuration -- both for green field tenants and for organisations already using a different trust method with Windows Hello for Business (WHfB).
Simplicity is elegance

Drawing by Nanna Mardahl
In this post, we will show you how to configure Cloud Kerberos Trust for your on-premises infrastructure and how to create a configuration policy for your client devices.
Enabling Entra Kerberos for Cloud Kerberos Trust
This is so easy. Honestly, put one hand behind you back, juggle some wet frogs and sing "I will always love you", all at the same time, and you will still be able to configure Entra Kerberos too.
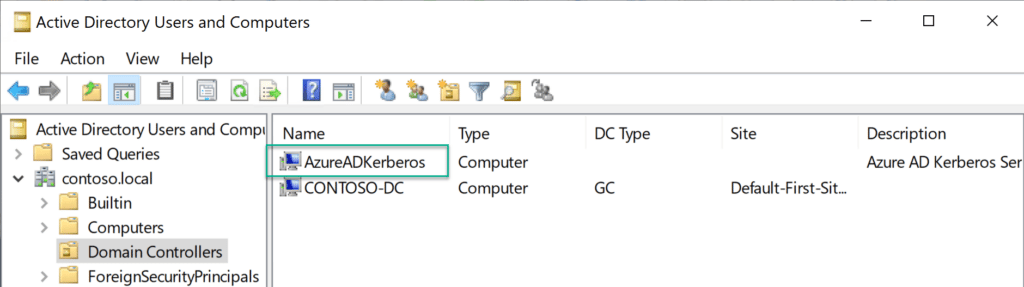
Enabling Entra Kerberos creates an "Entra Kerberos" server object in the domain.
This server object:
- Appears as a Read Only Domain Controller (RODC) object, but isn't associated with any physical servers.
- Is only used by Entra ID to generate partial TGTs for the Active Directory domain. The same rules and restrictions used for RODCs apply to the Entra Kerberos Server object.
We will configure Entra Kerberos in our lab. Full prerequisites can be found here and the code samples are taken from the Microsoft docs here.
1. Download and install the Entra Kerberos PowerShell module
From the PowerShell Gallery. This can be done directly on the Domain Controller or from a computer that can access the Domain Controller.
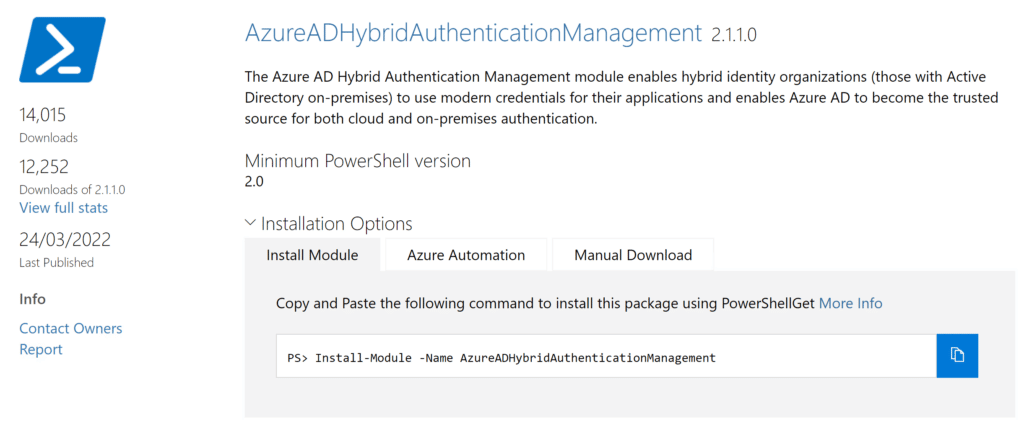
Install-Module -Name AzureADHybridAuthenticationManagement -AllowClobberNOTE (Updated 2026): The
AzureADHybridAuthenticationManagementmodule retains its original name for backward compatibility despite the Entra ID rebrand. The cmdletsSet-AzureADKerberosServerandGet-AzureADKerberosServerin this module are NOT deprecated -- they are the current supported method for managing the Entra Kerberos server object.
TLS 1.2 is required to access the PowerShell Gallery. Run the following command if it is not enabled:
[Net.ServicePointManager]::SecurityProtocol = [Net.ServicePointManager]::SecurityProtocol -bor [Net.SecurityProtocolType]::Tls122. Run the following
# Specify the on-premises Active Directory domain. A new Entra
# Kerberos Server object will be created in this Active Directory domain.
$domain = $env:USERDNSDOMAIN

# Enter a UPN of a Microsoft Entra ID global administrator
$userPrincipalName = "admin@contoso.onmicrosoft.com"

# Enter a domain administrator username and password.
$domainCred = Get-Credential

# Create the new Entra Kerberos Server object in Active Directory
# and then publish it to Microsoft Entra ID.
# Open an interactive sign-in prompt with given username to access Entra ID.
Set-AzureADKerberosServer -Domain $domain -UserPrincipalName $userPrincipalName -DomainCredential $domainCred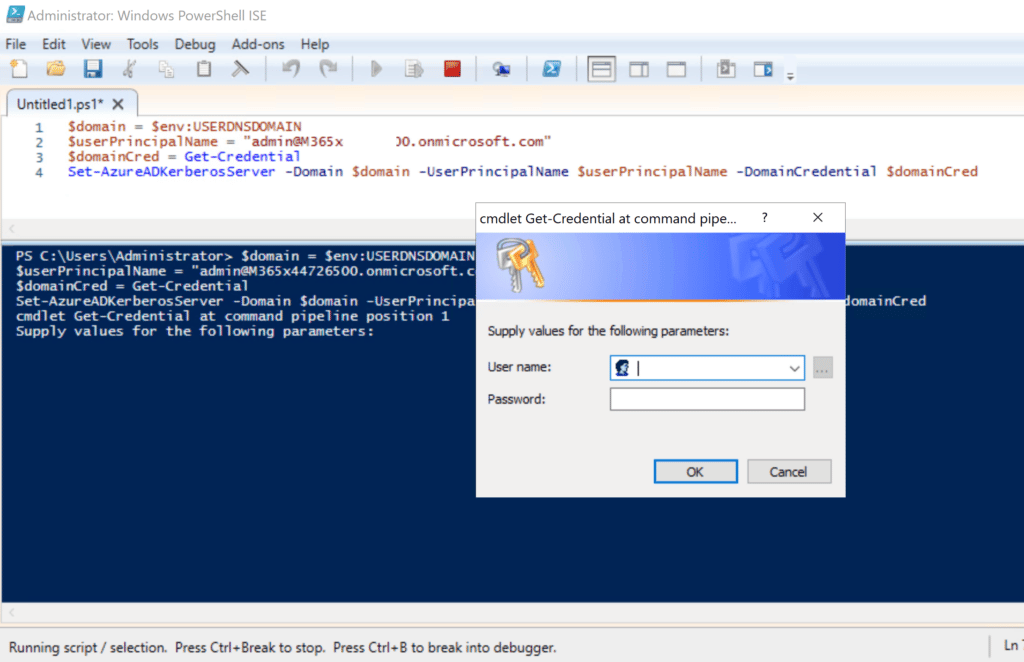
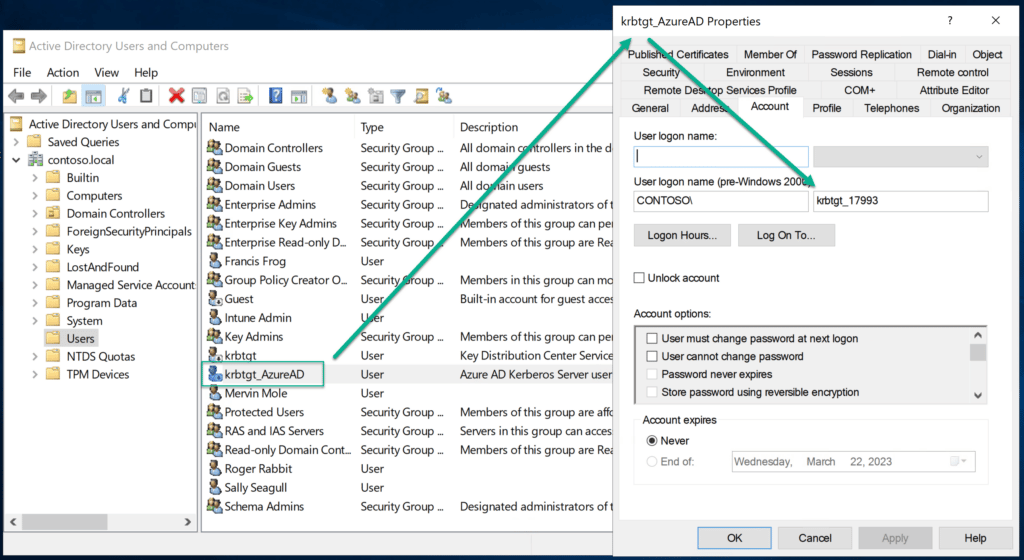
3. Verify that the Kerberos server RODC object was created successfully
Get-AzureADKerberosServer -Domain $domain -UserPrincipalName $userPrincipalName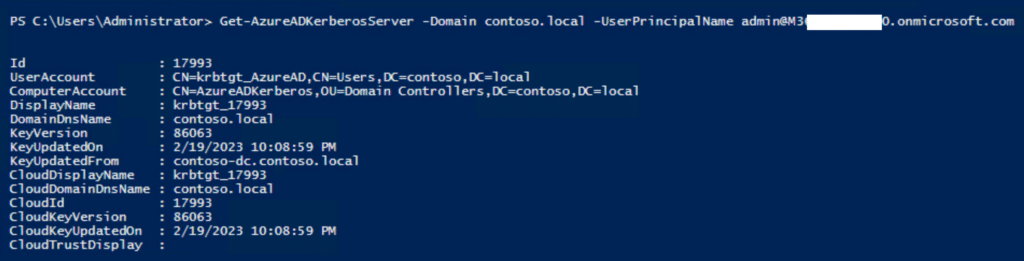
4. Also verify that the krbtgt user account was created (it is intentionally disabled)
Configure Cloud Key Trust using Intune
We can either use a GPO or push a configuration from Intune. If you are interested in using a GPO, read more here. In this post we will push the configuration from Intune (this is the way).
Ensure the client devices are a minimum of Windows 10 21H2 / Windows 11 Pro or Enterprise SKU. Perhaps consider using an Intune Filter for targeting.
1. Create a configuration profile
Assuming you don't already have an existing policy for Windows Hello for Business, we will add it in its simplest form using the Settings Catalog.
2. Settings catalog profile
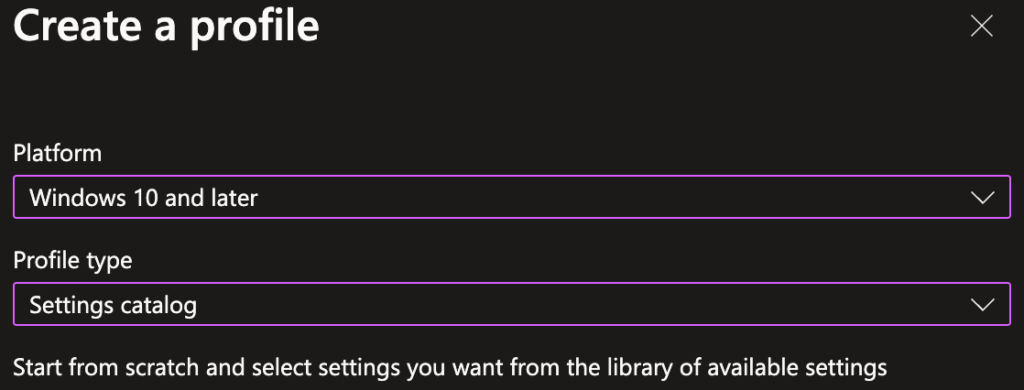
Go to the Windows configuration profiles area and click "Create profile".
Select the "Windows 10 and later" platform along with the profile type "Settings catalog" and click Create.
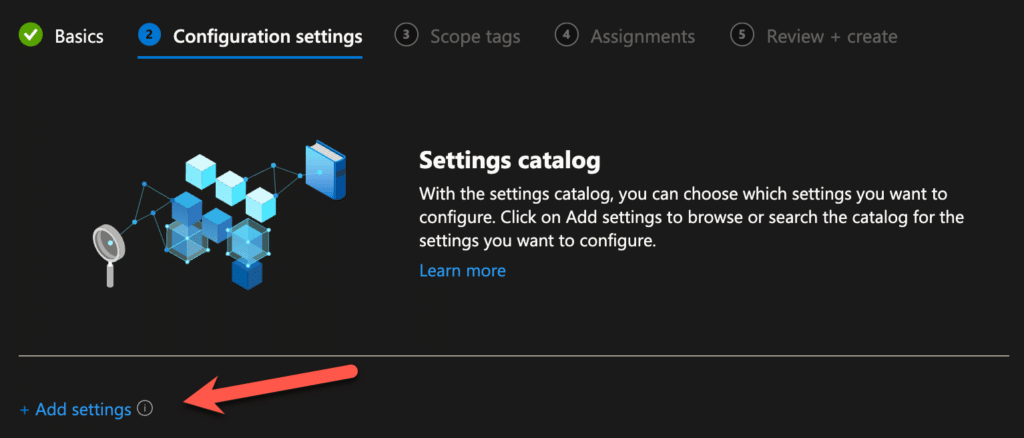
Give it an appropriate name and description and click next.
Now, start adding settings by clicking on the "Add settings" button.
The list of settings is LOOOONG, so, you want to do a search for "Windows Hello for Business" and click on the appearing category name "Windows Hello for Business" when it returns the result. Now we start by selecting the following settings (this is a minimum):
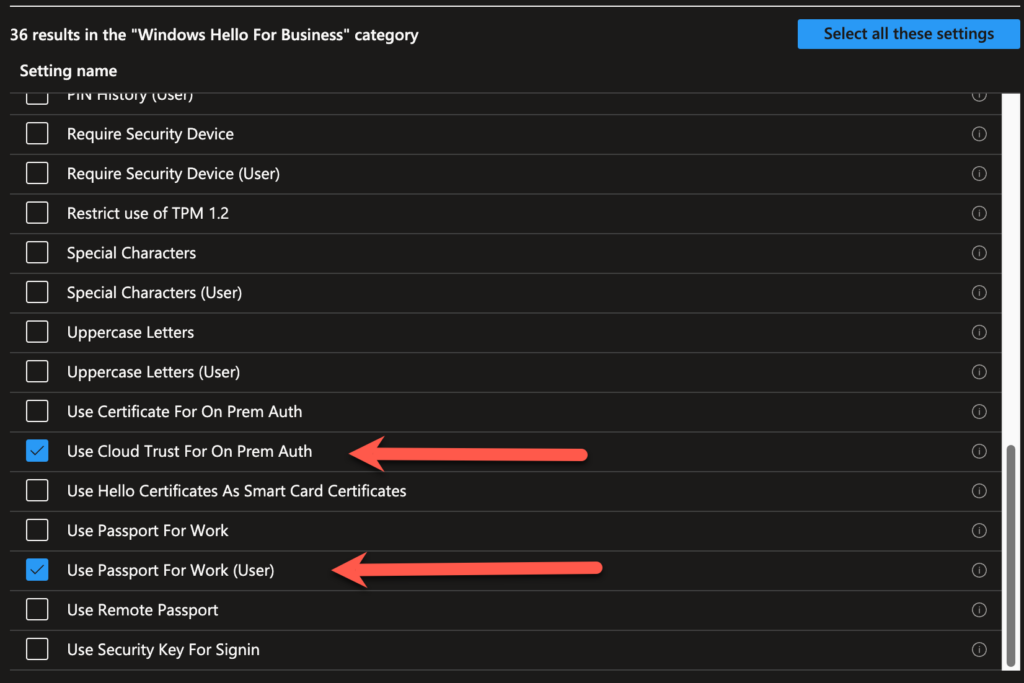
- Use Cloud Trust For On Prem Auth
- Use Passport for Work (User)
A few things to note here...
One is, that Passport for Work is the name in the CSP for "Windows Hello for Business", it is a leftover from Microsoft rebranding. So, don't get stuck on that. Speaking of rebranding, "Cloud Trust" and "Cloud Kerberos Trust" are the exact same thing, just another rebranding.
Second thing is that we selected a policy setting with the text "(User)" in it. This indicates that the user is the target. Even if you assign to a device, this policy will be a user scoped policy on that device. This takes precedence over any other policies that might be targeted to the device. For Windows Hello for Business in Intune, the rules of precedence is "Tenant wide settings" over "User" and lastly "Device".
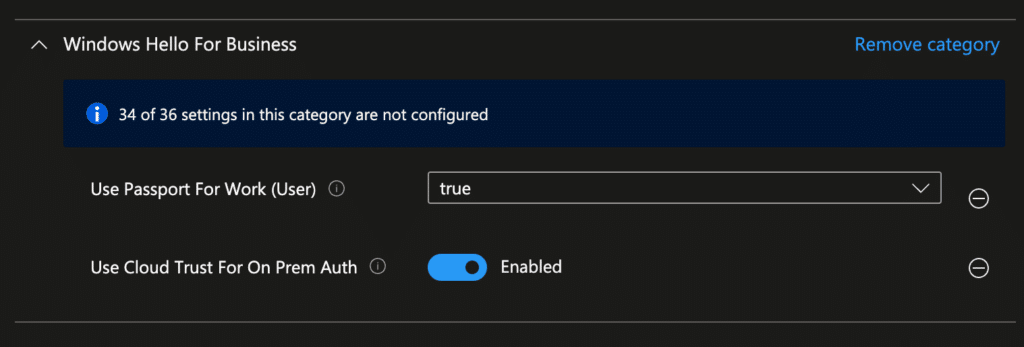
Lastly we enable the settings and move on to the next part.
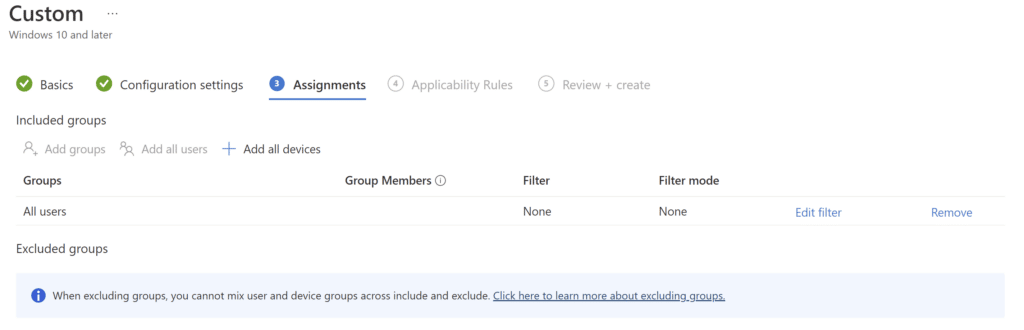
3. Assignments
Assign the profile to your desired group. You can target either users or devices according to your own preference or policy in-house.
4. Test the policy worked
Now we are assuming that the policy has applied from Intune...
At this stage, after a synced user logs in using WHfB, verify that a partial TGT has been issued using the command:
klist cloud_debug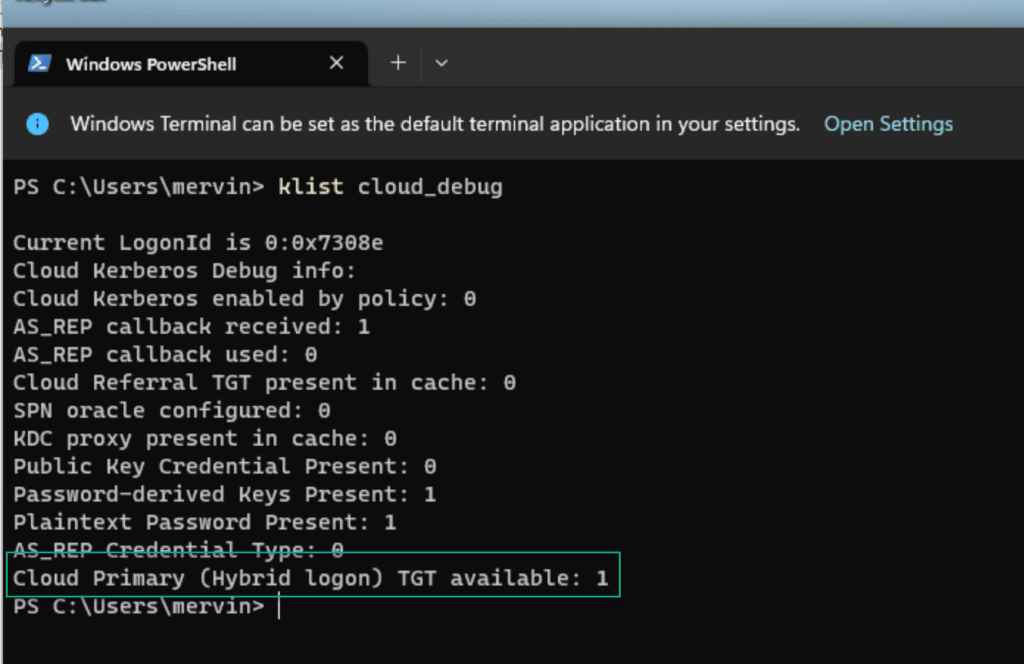
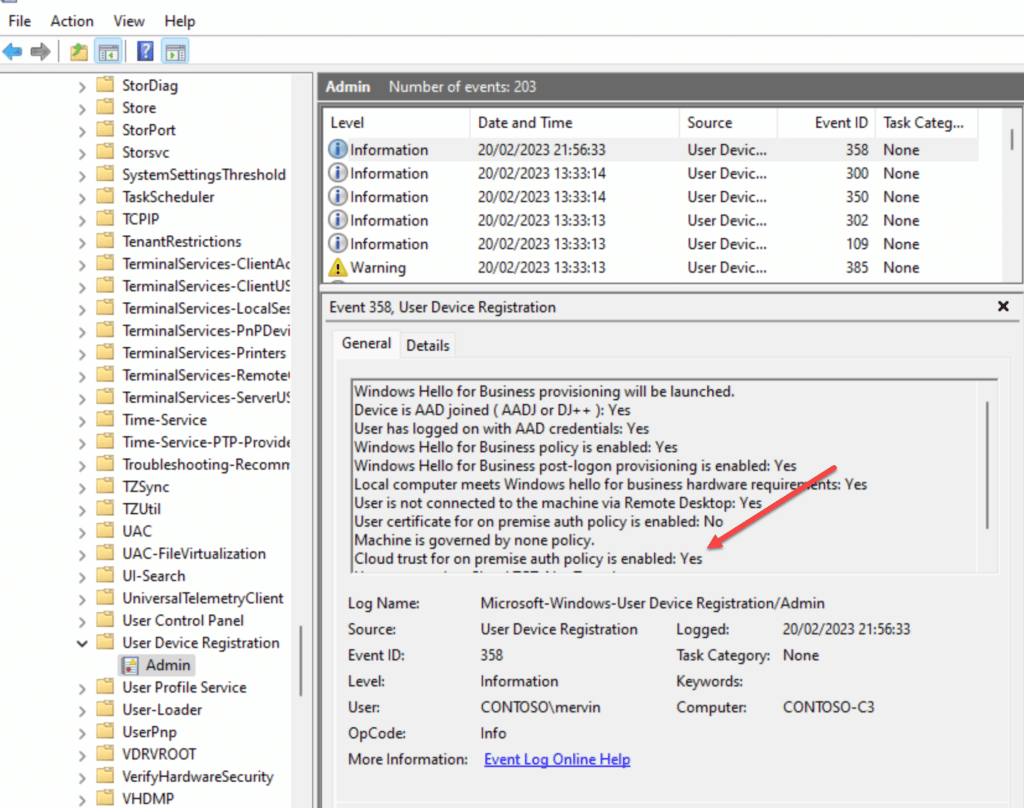
You can also verify in the event log if the policy has been set successfully on the client.
If you don't see the Cloud Primary TGT, then you might not have gotten a new token from Entra ID, and you can force that process by running the command line (as the user):
DSREGCMD /REFRESHPRTThen wait a bit and issue the command:
DSREGCMD /STATUSYou should be able to see the "SSO" part has the following values set:
OnPremTgt : YES
CloudTgt : YES
Summary
In part 2 of this mini series we looked at how to configure Cloud Kerberos Trust. In Part 3 we will dive a little deeper into some of the moving parts and help with some troubleshooting tips. Stay tuned for more fun!